Difference between revisions of "Help:Using Files"
MyraMidnight (talk | contribs) m (→Gallery) |
MyraMidnight (talk | contribs) m (→Gallery) |
||
| Line 76: | Line 76: | ||
</pre> | </pre> | ||
<gallery caption="Mini Gallery"> | <gallery caption="Mini Gallery"> | ||
| + | File:Krafties Crafting.png|1 | ||
| + | File:Felion.jpg|2 | ||
| + | File:Eggsie.jpg|3 | ||
| + | File:Pandaire.jpg|4 | ||
| + | </gallery> | ||
| + | :You can change the size of each gallery frame by adding <code>widths=200px</code> or <code>heights=200px</code> (or both). | ||
| + | <pre> | ||
| + | <gallery caption="Mini Gallery" widths=200px heights=200px> | ||
| + | File:Krafties Crafting.png|1 | ||
| + | File:Felion.jpg|2 | ||
| + | File:Eggsie.jpg|3 | ||
| + | File:Pandaire.jpg|4 | ||
| + | </gallery> | ||
| + | </pre> | ||
| + | <gallery caption="Mini Gallery" widths=200px heights=200px> | ||
File:Krafties Crafting.png|1 | File:Krafties Crafting.png|1 | ||
File:Felion.jpg|2 | File:Felion.jpg|2 | ||
Revision as of 15:10, 13 August 2014
- Before you can add a picture to a page, you need to locate the file or upload the image first. Then you can use the following information to properly embed the image to the page as it benefits the page.
Please use Thumbnails for the most part, unless the image serves a explanatory purpose or to decorate a lonely page. It can be tricky to balance large images and text, so its best to just keep it small unless necessary.
- On this page I'll introduce you to:
- Thumbnails
- Framed images
- Plain pictures
- Gallery format
Uploading
When you upload file, you can always find them again on the List of Files uploaded. To make it even easier to locate, add the file to a proper category (help page).
Replacing/Updating File
- When you wish to replace a picture with a better one for whatever reason (better quality or updating) then simply find the original file and "upload newer version of this file"
- This is to avoid having duplicates of the same picture or cluttering space with outdated informative images.
- You can only replace pictures with the same format file (example:
.jpgcannot be replaced with a.png)
Thumbnails (thumb)
Thumbnails are for adding pictures relating to the page.
- Thumbnail examples:
[[File:Krafties Crafting.png|thumb|left|Description]]-thumbnail will be on the left side[[File:Krafties Crafting.png|thumb|center|Description]]-thumbnail will be in the center[[File:Krafties Crafting.png|thumb|Description]]-thumbnail will be on the right side[[File:Krafties Crafting.png|thumb|100px|center|Description]]-thumbnail will be 100px wide in the center
- Notes about Thumbnails
- Thumbnails are by default on the
Right. - Text wraps around thumbnails when its either to the
LeftorRight. - Biggest thumbnail by default is
220pxon either side. - The format of the link should always be [[File|Commands]].
- The order of commands does't matter, the wiki figures it out.
- To place a image on the left without text wrapping, use
noneinstead ofleft(example:[[File:Krafties Crafting.png|thumb|none|Description]])
Framed (frame)

Framed is like a mix between plain picture and thumbnail.
- Notes about Frames
- Thumbnails are basically resized Framed images, so same commands work for both.
- They appear in their original size by default (not resized like thumbnails)
- Even if Frames and Thumbnails are similar, frames do not have the resize button next to the description.
- Framed pictures are on the
rightby default, and text wraps around. Just like thumbnails.
[[File:Felion.jpg|FRAME|left|Description]]-displays the picture on the left, see how the text wraps
Plain Picture
- Plain pictures are best when they have a white background, else using Frames is better.
 *Text does not wrap by default. Plain pictures are in-line (it means the image is in the line with the text, so text does not wrap)
- Notes about Plain pictures
- Adding no command of type (
thumborframe) will result in a plain image. - Plain pictures are on the
Leftby default - They appear to be in-line, so text does not wrap around the picture by default.
- Text will actually wrap if you command the image to be on the
left. - Plain pictures cannot have a description/caption
- They are displayed in their original size by default, just like framed.
[[File:Krafties Crafting.png|500px]]- displays the image only resized.
Gallery <gallery>
Galleries are pretty simple to set up, you have your <gallery> tag and add each new item in it's separate line.
<gallery caption="Mini Gallery">
File:Krafties Crafting.png|1
File:Felion.jpg|2
File:Eggsie.jpg|3
File:Pandaire.jpg|4
</gallery>
- Mini Gallery
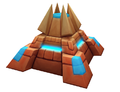
1
2
3
4


- You can change the size of each gallery frame by adding
widths=200pxorheights=200px(or both).
<gallery caption="Mini Gallery" widths=200px heights=200px>
File:Krafties Crafting.png|1
File:Felion.jpg|2
File:Eggsie.jpg|3
File:Pandaire.jpg|4
</gallery>
- Mini Gallery
1

2
3
4
- Learn more about the Gallery tag here
See also
- List of Files uploaded
- Help:Contents
- http://en.wikipedia.org/wiki/Wikipedia:Picture_tutorial How to format pictures